Thursday, February 20, 2014

Homemade laundry soap

Nicole again,

I was very skeptical at first about trying a “homemade laundry soap” I have read a lot about it and some people swear by them, but I really like my gain laundry soap that makes my laundry smell amazing. But as I was going through my linen closet organizing (getting rid of a ton of junk) I came across some ivory soap. Then that got me thinking hey I should try to make some laundry soap it would be free and I have all the stuff so  not too much harm would be done. So I gave it a try…..

Recipe:

  • 1 Bar of ivory soap
  • 1 Cup of Borax
  • 1 Cup of Washing Soda
  • 2 Gallons of water
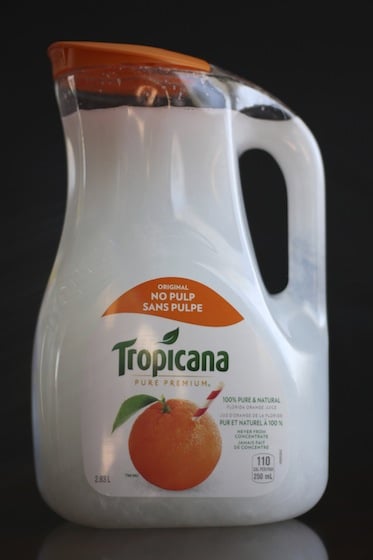
  • and a big container or two milk jugs like I used

I used this as a liquid since I'm not too fond of powder detergents,  you can shave the soap and mix it with the borax and washing soda and tada you have some laundry soap, but I like powder.

First you shave the ivory soap which can be a pain, or if you are feeling ambitious and your microwave isn’t silly like mine you can microwave it for 60 to 90 seconds and watch it explode, then after it cools break it into little tiny pieces. I had to strain my arm and shave it :( Anyways, after you have your soap in little pieces you are going to put it in a BIG pot, something that will fit the two gallons of water (if you dont have a big pot dont worry just make sure you have a big container like a bucket handy so you can add everything together). You will wan to add about 1/4 gallon of water to your soap and stir it till it dissolves, it should be on medium heat. Mine created a lot of suds which is ok.

After the soap is all dissolved take the pot off the heat and add the borax and washing soda, add about half a gallon of water (make it hot tap water). Stir till it all dissolves. If you have a big pot then just add the rest of the water, if not then get a bucket or a plastic container something that will hold all two gallons of water. You will want to add the rest of the water and let it sit over night.

homemade laundry detergent in a 5 gallon bucket

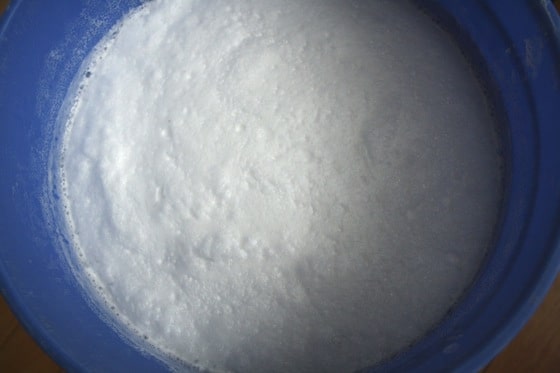
The next morning it will be the weirdest thing you have ever seen. No there is not a jelly fish in your newly made laundry soap,. just the reaction of all the ingredients. You can mix it with a spoon and put it in the container and your done. Or if you are like me and a little perfectionist, and you dont jelly fish washing your clothing, you can blend it in a food processor then add it to the container of your choice.

Before each load you will want to give it a good shake or stir (milk jugs or juice containers are the best you can put the lid on and shake it) then add 1/3 cup to each load.

Homemade Laundry Detergent in a juice jug

Review: I like it, but it doesn't have a scent to it really after the clothing is dried. Also it makes clothing a little static, but a dryer sheet can fix both of those problems. I just add one or two depending on the load amount. Also I added vinegar as my rinse agent and it seemed to do really good at making the clothing really soft.

Another thing you can add those little purex crystals, or bounce crystals to the washer and that would make them smell nice.

**If you want to use Zote or Fels-Naptha laundry soap you will want to use only HALF a bar, you can also you homemade soap.


Tuesday, February 18, 2014

homemade dishwashing powder

Nicole here, I’ve been on a make your own stuff kick lately and thought this week I would share some recipes that I have tried and liked. Give them a shot you might even like them and never buy store bought stuff anymore, or you can experiment like me and decide yeah I like my gain soap.
Dishwasher Detergent Recipe
  • 1 cup borax
  • 1 cup washing soda
  • 1/2 cup Lemi Shine (Citric Acid)
  • 1/2 cup kosher salt (for scrubbing action)

You will want to mix all the ingredients and put them in an air tight container, it will be a hard as a rock if moisture gets to it. Then I have a special plastic tablespoon that I use just for my powder. I leave mine under the kitchen sink and grab it when I start a load of dishes. Each batch yields 24 ounces of detergent. It costs around .06 cents per load which is amazing compared to store bought stuff.

DSCN1089

Use 1 Tbsp per load (you can use a heaping tablespoon if you feel the need, but we do not).

I found all the ingredients at my local Winco. The lemi shine is in the dish wash aisle and the others are by the laundry soap aisle.

Another thing I have seen but haven’t tried is adding two to three packs of lemon koolaid (yes you can use the cheap off brand). Apparently it adds a nice scent and the lemon acts as a added cleaner and antibacterial.

Rinse Aid: I use vinegar  in my rinse agent compartment. It doesnt leave a weird smell, and it actually works really good for hard water spots.

Next post will be laundry soap, which i was very skeptical of…..

Monday, February 10, 2014

Heart Trees

Vday crafts 053


Today I thought we’d try to liven things up a bit at our house with a Valentine’s Day art project. Heart trees. They looked so cute and unassuming on Pinterest, but they turned out to be a lot more involved than I’d originally thought. Does this ever happen to you? You get smack in the middle of an activity with your kids before you realize that you bit off a little more than you bargained for. Haha! Oh well, pressing forward…


The hand print tree-trunk part went fine. We’ve done that before.


Vday crafts 041


But making the hearts got tricky. I thought the boys (ages 6 and 4) would be able to do the hearts by themselves, but since the paper strips were pretty small, it took a lot more coordination, and I ended up making most of the hearts (my 6 year old did some, but lost interest after about 8 hearts) and just having the kids glue them on. First, you have to do kind of a funky, twisty thing with the paper to get the staple in the right place.

Vday crafts 046

Then you have to squish the bottom of the heart into a point.

Vday crafts 049


Once you have a bunch of hearts, you can glue them into place fairly easily. And the trees do turn out super cute when they’re finished. Maybe a good solution would be to just have longer paper strips (and therefore bigger hearts), and that way the kids could do it all on their own. Either way, we finished the project. It took longer than I wanted it to, but it was still festive and fun. And now we have some great Valentines décor hanging up for all to see.

photo (1)

Signature 2 (2)

My February “Mantle”


Okay, so I really don’t have a “mantle.” But we will just call it that! Haha! It is actually the top part of our gorgeous entertainment center. It was part of the house when we bought it last year. Sorry for the photo, it was getting dark!

9a


I LOVE Valentine’s day. But I don’t usually go all out and decorate for it like I do for Christmas. But I wanted a little something. Here is a better look at it:

8a


I think it turned out so very cute! Let me break down from left to right what I did to put together this little Valentine’s vignette. First, I wanted some kind of white flower. Because it’s still winter, I didn’t want to go all out for colorful pink or red flowers. You might be thinking, “Why didn’t you go for roses?” Well, I didn’t want it to be too “cliché Valentine’s décor.” I stopped in at my local Dollar Tree and snagged these little white berry things. I have a lovely white teapot set and I borrowed the sugar bowl for the berries to rest in. I also wanted some kind of weather book to go with the décor. I didn’t have any and I wasn’t in the mood to run to my second hand store. So I found some old college books from my hubbies first year in school and ripped off the covers. I know! Shame on me! But here’s the deal: We have tried to sell them back three times. So I didn’t feel bad using them for decoration. Some of the pages were too perfect and too white. I didn’t have any stain on me so I SUPER improvised! I used Vanilla Extract and dry Hot Chocolate mix (yes, you read that right!). I smudged the vanilla over the bindings and pages and then rubbed the dry cocoa into it. Perfect weathered look! I tied them together with some girly baker’s twine. Perfect!

5a


Onto the logs with the flowery “things.” Have you ever see “The Lorax?” Well, I decided that these ruffle things look like the Truffula trees from that movie (kinda). But, like I said before, I wanted to do something different from the normal flower thing. I had Styrofoam balls and hand and some lovely left over red fabric. I ripped the fabric into strips, sewed the largest stitch on my sewing machine down the middle, and gathered the stitch by hand. Then I hot glued the fabric to the balls. Easy peasy! To keep them on the logs, (which my husband cut for me), I drove a tooth pick in and then attached the Styrofoam ball to it. Done!

6a 


Next is my very favorite part! The middle log with the heart carved into it. I attempted to carve a heart by myself with a kitchen knife. Ya….. dumb, I know. When my husband got home from work, I wanted to throw the stupid thing through the window! I only managed to carve a FAINT line of a heart. I asked if he would be willing to help. He went to the garage and I went to the kitchen to eat chocolate.

Anyway, He came back with this spectacular carved heart! I couldn’t believe it! So much more than I expected! The next day, he picked up an inexpensive wood burning kit from Wal-Mart and I burned our initials into it. We also lined the heard with the burning tool to make it pop a bit more! Don’t you love it?!

7a


The last thing on the right is another white dish with a candle in it. I wanted to “fluff” it up, so I added some coffee filters around it. I did stick some Chinese Cherry blossoms (fake) around the right side to give it a little extra oomph. Then sprinkled the front with some left over berried and WALAH! I think it turned out so cute!

Do you decorate for Valentine’s Day? I’d love to hear from you and see emails. Thanks so much!


2

Friday, February 7, 2014

Guest Post from “Amber May Be…”

Hey Everyone! We would like to introduce you to Amber from Amber May Be….  Her blog is so incredibly cute, full of tons of fun stuff! Hop over and check her out! Today, she is guest posting, sharing an adorable mail organizer she made!


DIY Mail Organizer

I don’t know about you, but for me one of the hardest parts about keeping our home organized is taking care of the paper war. At my house that means mail. I wasn’t motivated to organize my mail into a cluttered drawer so I made this cute organizer to help out. I was inspired by a pin that I can’t find for the life of me, but please note that somewhere out there is a creative person with a cute mail organizer that looks a lot like this one ;).

clip_image002

This is a super simple craft. All you need is an old picture frame, some clothespins, scrapbook paper, Elmer's glue, embroidery floss and push pins.

Here are the steps:

1. Push 3 push pins into one side of your frame and two into the other as shown. Stagger the push pins and leave a little space between the head of the pin and the frame, you don’t want them flush with the wood/plastic.

clip_image004

2. Tie the end of your embroidery floss around the top right push pins and then lead across the front of the frame to the top left pin, wrap around, and lead it to the middle right pin where you once again wrap it around the pin, continue this in a zig-zag pattern across the frame until you have reached the last pin, finish it by tying the floss in a simple knot.

3. Now cut your cute paper to the size of your clothespins and glue them on. Let them dry and hang the clothespins on the embroidery floss. If you want you can write on your clothespins or even print onto the paper different categories. I have in, out, and bills on mine.

There you have it! Super simple J Oh, and for a bonus tip, you see all those empty envelopes? Those are the envelopes sent to us by credit card companies and other spammy places. I keep them so I don’t have to purchase envelopes, I might as well get some use out of annoying junk mail.

Thanks and happy mail organizing!

- Amber

Valentine's Day Countdown~14 Days of Love!


I am always looking for ideas to make 'life' a little more fun. As a mom of two, I want my children to have special memories of growing up and remember fun things we do as a family. I want them to carry on some of our family traditions when they become parents.

Growing up, my mom always did a little thing called "The 14 days of Valentine's Day". It was a fun countdown to V-day! Every day we received some sort of little 'gift'. Sometimes it was on our pillow after school, by our bed when we woke up, etc. I remember how fun and exciting it made the long winter months. It seems winter really drags on here in Idaho. It stays snowy and cold for a long time, so any excuse to add a little brightness and excitement to the dreary winter days, I'm all for it!!!

Over the years I have carried on the tradition and brought the fun Valentine's Countdown to our house!!...But, I add a twist! My girls can only participate in this fun activity IF their chores are done and their room stays clean! I have tried many ideas to help motivate my girls to keep their room clean, and many ideas have failed. They are great at doing EVERYTHING else I ask them to do, but not their room. So, them knowing that there's a special treat waiting makes them very motivated to help in anyway possible-SCORE!!!

I feel Valentine's day is about love, not about candy. I do give my kids candy on some of the days, but I also give them things they can wear, use, and play with.  I also try to incorporate service in our countdown. I feel like teaching my children to serve others will be the best thing I can teach them and SERVING OTHERS=SHOWING LOVE FOR OTHERS!

Last Year's Gifts
Here are some fun ideas I am using or have used in the past~
*Of course they'll get fun girly stuff-chap stick, hair bows, jewelry, journals, sunglasses, etc. (If you have boys~you can give them cars, legos, dinosaurs, etc...I only have daughters-Hahaha!)
*Make a cute crafty Valentine for a few days--"Hugs and Kisses", "You're a Sweetheart", etc. (I have found a ton on different blogs and I have included a few printables also)
*One day give them  cupcake stuff (cake mix, frosting, decorations, etc.)
*Another day sugar cookie stuff (of course we will deliver goodies=service)
*Give someone a "heart attack!!"~Cut out and decorate a bunch of hearts and stick them to someone's front door!!!
*Crafty stuff (beads for bracelets, loom bands, puzzles, ceramics and paint, etc.)
*Clothes or Socks (dresses, shirts, leggings, etc.)
*It's halfway through the school year~Do your kids need something new?  My kids need new pencils, tablets, and folders-so I got them some fun colorful ones! I have also gotten them flashcards and made file folder games
*Give them a nail file and new nail polish and have a 'pedicure party' day!!!
*I also give my kids practical stuff like a new toothbrush (my kids absolutely love getting one), body wash, lotion, hairbrush, etc.
*A 'Birthday For Daddy' Day (My husband's birthday is v-day, so we'll make him a b-day treat, decorate, wrap presents, make cards, etc.)
*"Send Love to Someone Day"-Get fun paper, stickers, glitter glue, paint, etc and make cards to send to loved ones (grandparents, cousins, missionaries, friends)...This would also be a good day to have you kids do something fun for their classmates (assemble and write valentines, etc)
*Give your kids a movie ticket and take them to the movie theater or set up a fun movie night at your own home
*Buy Valentine's fabric and make your kids something special (pillowcase, skirt, blanket, etc.)

It is so fun to think of new, fun ideas and to carry on this tradition year to year.  As soon as Christmas is over, I am excitedly looking for awesome deals to use for my countdown.  You can spend as much or as little on your treats.


 This year, I decided to do a few days less expensive, so I made a few cute baggie toppers to fill with treats.  I cut out the cards and glued them to scrapbook paper and stapled them to snack sized zip top baggies. The clipart I used came from www.mycutegraphics.com.


***I also included my husband in the countdown this year...some days he gets the same treat as the girls, other days he gets something different...(a can of honey roasted cashews with a tag saying "I'm NUTS about you!" Or his favorite Mountain Dew with the saying "I DEW love you so much!")  You can be as cheesy as you want--haha!


Thursday, February 6, 2014

Host a Vday Party for the Kidlets

Since I’m a homeschooler, I try extra hard to facilitate fun holiday things in my home, so the kids don’t feel left out when all their neighborhood friends are talking about class parties, and treats, and what-not.

But you don’t have to be a homeschool mom to throw a super-stellar Valentine’s Day party for your kids and their friends.

DSC03589The first thing I always do is decorate. My kids love to help, and it’s fun to let them. My six-year-old is a pro at cutting out paper hearts, so I assigned him to make a heart banner. He chose to do a white, pink and red pattern; but anything at all, pattern or no, will be festive and fun. I used his banner as the focal decoration, but accented it with crepe paper streamers, and a plastic, disposable, pink table cloth.

As our party guests arrived, I gave them each a brown paper sandwich bag, and have a bucket of crayons handy, so they could get right to work decorating a bag to hold their Valentines in. This also serves as a good gathering activity, while you wait for everyone to arrive.


Then it’s time to really get the party started, with games! Disney love songs musical chairs is always a hit. And so is BINGO. I found this adorable free BINGO printable from crazylittleprojects.com. Check out her site, it has loads of cute things.

VdayBingopic

DSC03583After games it’s time to make some treats. My favorite Vday treat to make with kids is candy and fruit kabobs. I make piles of different fruits and candies (i.e. bananas, strawberries, dried apricots, heart shaped marshmallows, cinnamon lips, sugary gummy hearts, etc.) and I give each kid a shish-kabob skewer (and warn them to be careful with the sharp end) and let them make their own. It’s always a big success.

When the kabobs start winding down, it’s time for the finale. The Valentine exchange. I’ve found that the easiest way to do this, is to line all the bags up in a row on the table or floor, and have the kids walk down the line and drop a Valentine in each one along the way. When everyone is finished passing out their Valentines, I take a stapler and staple each paper bag shut, so nothing will spill out, and everything will make it home all in one piece. (And so no stay candy wrappers find their way onto your floor.)

IMG_0514As a party favor, I send each kid home with a Rice Krispy treat heart. Basically you make your normal Rice Krispy treat recipe, and then before the mixture cools you take spoonfuls and pat them into a large heart-shaped cookie cutter, so they become heart-shaped, and then stick them on a pan covered in wax paper to harden. Once they’ve hardened, melt a cup of chocolate chips and a Tbsp of vegetable oil over medium heat on the stove, stir it up until well blended, then drizzle a little bit of melted chocolate over the top, just to make them fancy. :) Adding the oil will make your chocolate drizzle more smoothly. When the chocolate dries, put your Rice Krispy hearts into a cute cellophane bag, tie it up with some red ribbon, and there you have it. A successful Valentines Day shindig for the kidlets. You can cross that one off your list. ;)


Signature 2 (2)

Wednesday, February 5, 2014

Valentines Dine-In Dinner for Two

Close your eyes. Picture your ideal romantic dinner. Perhaps you venture out into the heavy traffic and turn circles around and around the parking lot before finally spotting an opening? Do you squeeze into the lobby of your favorite restaurant and stand nose-to-nose with strangers for an hour waiting for a table? Are you rushed by your waiter, who wants you in, fed, and out in record time so he can give your table to another happy couple?

Oh, that’s not what you pictured? Me either.

Early on in our marriage, my husband and I decided that going out for Valentines Day was not our cup of tea. The hubbub of a restaurant tightly packed two by two like the sardines on Noah’s Ark, never felt very intimate to us. So… we choose to dine in, using the money we would have spent eating out, to buy the menu items needed to cook a special meal we can appreciate  in the serenity of our own home.

Here’s what a Valentines dine-in dinner for two looks like at our house.

Valentines Post Pics 024Drinks. Let me re-phrase that: fancy drinks. These are a must, nothing says “romantic dinner” like a fancy drink. Sometimes we do Martinelli’s sparkling apple cider. Sometimes we like to do frozen strawberry daiquiris (non-alcoholic). But no matter which drinks you decide on, make them something special and fun.

Bread. Most restaurants serve bread or biscuits to start off a meal, and you can too! Garlic Cheese Biscuits are my favorite to serve, because they seem so classy. These taste just as good as Red Lobster’s; I promise, and they are oh, so incredibly easy. You’ll never buy Rhodes biscuits again.


Garlic Cheese BiscuitsHindenberg 080
2 cups Bisquick mix
2/3 cup milk
1 cup shredded cheese
1/4 cup butter melted
1/4 tsp garlic powder


1. Heat oven to 450.
2. In a medium bowl, stir Bisquick, milk, and cheese with a wire whisk or fork until a soft dough forms; beat vigorously 30 seconds. Use a spoon to drop dough about 2-inches apart onto an ungreased cookie sheet. (You’ll get about 12 biscuits).
3. Bake 8-10 minutes until golden brown. Meanwhile, in a small bowl, melt butter. Add garlic powder and stir until well mixed.
4. Brush butter/garlic mixture onto warm biscuits before removing from the cookie sheet. Serve warm. (But they are still excellent when they are cold too!)


Salad.  I favor a green, garden salad, but you can do what you want here. I like to use spinach, cherry tomatoes, cucumbers, chopped purple onions, shelled sunflower seeds, bacon bits, raisins, and croutons. Tossed all together with some home-style Ranch dressing.

Meat. The way to a man’s heart might very well be through his stomach, but the way to my heart is steak. And chocolate, but we’ll get to that in a minute. When I’m dreaming up a special occasion, a steak is the only way to go. To ensure that your steak turns our fantastically, marinate it. Over night, if possible, but at least for a couple of hours. Here is my favorite steak marinade.

Steak Marinade art show 030
 
1/4 cup lemon juice
1/2 tsp hot pepper flakes
1/2 tsp black pepper
1/2 tsp salt (sea salt if you have it)
3 (or more) gloves of minced garlic
1/4 cup chopped cilantro
1/2 cup olive oil

1. Mix all ingredients together and pour over meat. I like to put everything in a gallon zip-lock bag so I can shake it up occasionally to make sure all parts of the meat get covered. Marinate for 2-24 hours.


Dessert. We save the best for last, of course! Black Forrest Cherry Cake. I only make this on Valentines Day, and I make it every year.  It’s a little bit of work, but 110% worth the effort you put into it. It’s heaven.

Black Forest Cherry CakeValentines Day 2012 015
2 1/8 cups flour
2 cups white sugar
3/4 cup unsweetened cocoa powder
1 1/2 teaspoons baking powder
3/4 teaspoon baking soda
3/4 teaspoon salt
3 eggs
1 cup milk
1/2 cup vegetable oil
1 tablespoon vanilla extract
2 (20 ounce) cans pitted sour cherries
1 cup white sugar
1/4 cup cornstarch
1 teaspoon vanilla extract
3 cups heavy whipping cream
1/3 cup powdered sugar


1. Preheat oven to 350 degrees F (175 degrees C). Grease and flour two 9 inch, round, cake pans; cover bottoms with waxed paper.
2. In a large bowl, combine flour, 2 cups sugar, cocoa, baking powder, baking soda, and salt. Add eggs, milk, oil, and 1 tablespoon vanilla; beat until well blended. Pour batter into prepared pans.
3. Bake for 35 minutes, or until wooden toothpick inserted in centers comes out clean. Cool layers in pans on wire racks 10 minutes. Loosen edges, and remove to racks to cool completely.
4. Drain cherries, reserving 1/2 cup juice. Combine reserved juice, cherries, 1 cup sugar and cornstarch in a 2 quart saucepan. Cook over low heat until thickened, stirring constantly. Stir in 1 teaspoon vanilla. Cool before using. (If you absolutely have to cut a corner somewhere, you can skip this step and use a large can or two of cherry pie filling instead.)
5. Combine whipping cream and confectioner's sugar in a chilled medium bowl. Beat with an electric mixer at high speed until stiff peaks form. (One year when I was pregnant, I tried to cut a corner on this step and use Reddi-Whip. Don’t do it. It’ll ruin your cake, just make the whipping cream. It’s worth it.)
6. With long serrated knife, split each cake layer horizontally in half. Tear one split layer into crumbs; set aside. Reserve 1 1/2 cups Frosting for decorating cake; set aside. Gently brush loose crumbs off top and side of each cake layer with pasty brush or hands. To assemble, place one cake layer on cake plate. Spread with 1 cup frosting; top with 3/4 cup cherry topping. Top with second cake layer; repeat layers of frosting and cherry topping. Top with third cake layer. Frost side of cake. Pat reserved crumbs onto frosting on side of cake. Spoon reserved frosting into pastry bag fitted with star decorator tip. Pipe around top and bottom edges of cake. Spoon remaining cherry topping onto top of cake.


Valentines Day 2012 032
And there you have it. Everything you need to create your own restaurant quality dinner for two. Enjoy!

Signature Krystal

Monday, February 3, 2014

Valentine Subway Art *Free Printables*


I love, love all things Valentine's Day!  Not only is it the day my husband was born, but my two daughters make any holiday fun!  So, I made this cute printable in honor of all things LOVE!


I usually save the file to a flash drive and take it to my local copy center and have them print in color on 8.5 x 11 white card stock.  It always turns out awesome and is so much cheaper than having an 8x10 printed by a photo place.  I usually can get a full page of color for under $.60 a sheet!


February 2014 Visiting Teaching Message

Hey everyone Karen here!  I am excited for this month's Visiting Teaching message! The full message is found here, if you'd like to share it.


I plan go visit my ladies this week (before Valentine's Day).  I am going to give this message, a sweet treat, and my framed Valentine's printable ~found here~!  


I have made 2 different handouts, one with a white background and one with black~